
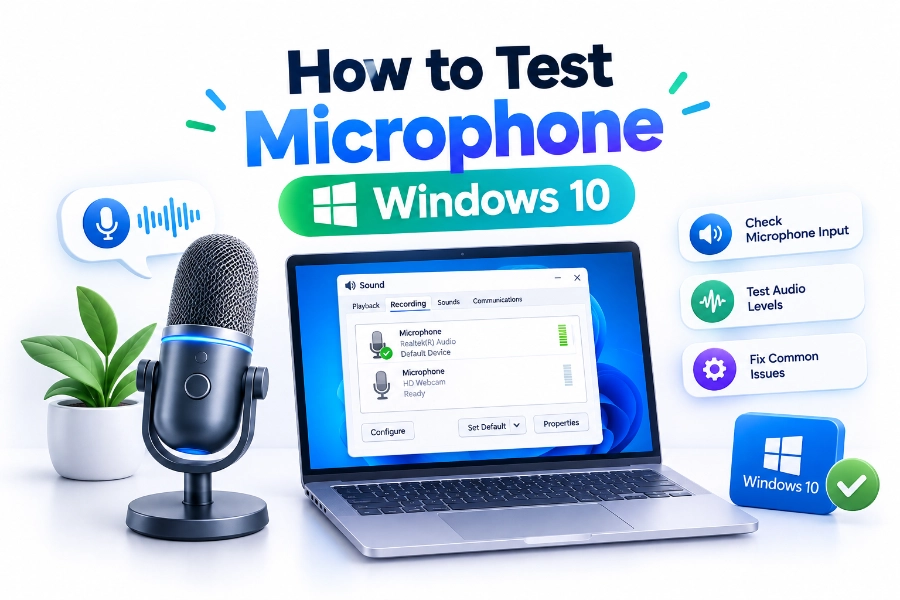
A microphone problem can interrupt a video meeting, ruin a recording session, or leave friends unable to hear you during a game. Windows 10 includes several built-in tools that make it easy to confirm whether your microphone is working before you blame an app, replace hardware, or change a dozen settings.
Learning how to test microphone windows 10 is useful whether you use a USB headset, laptop microphone, webcam microphone, Bluetooth device, or professional audio interface. A quick test can reveal whether Windows is receiving sound, whether the correct input device is selected, and whether privacy settings are blocking access. Once you know where the issue starts, fixing it becomes much less frustrating.
This article walks through practical testing methods, common configuration checks, and reliable troubleshooting steps. You will also find advice for improving sound quality, testing microphones in popular apps, and avoiding the small settings that often cause silent audio.
Test Your Microphone in Windows 10 Settings
The fastest way to test a microphone is through Windows 10 Settings. Connect your microphone, then open Start and select Settings. Choose System, select Sound from the left menu, and scroll down to the Input section. Select the microphone you want to test from the device list.
Speak normally and watch the blue input bar below Test your microphone. If the bar moves while you speak, Windows is detecting your voice. Select Troubleshoot if the meter does not react, especially when the device is connected correctly but no audio signal appears.
Choose the Correct Input Device
Windows may select a webcam microphone, monitor microphone, headset, or built-in laptop microphone instead of the device you intended to use. In the Input section, open the dropdown menu and compare each listed option until you find the microphone that responds to your voice.
Give the selected device a clear name if you regularly switch between audio sources. Select Device properties, enter a recognizable name, and save it. This is particularly helpful when several USB devices use similar default names such as Microphone or USB Audio Device.
Adjust Microphone Volume and Sensitivity
A working microphone can still seem broken when its input level is too low. In Sound settings, select Device properties and use the Volume slider to raise the level. Start around 75 percent, then test your voice again to avoid distortion caused by excessive gain.
For finer control, select Additional device properties and open the Levels tab. Some microphones also offer Microphone Boost. Increase boost gradually, because high settings can add hiss, background noise, and an echo-like quality that makes speech difficult to understand.
Quick Microphone Testing Checklist
- Confirm that the microphone is plugged in, charged, or paired through Bluetooth.
- Select the intended input device under Windows Sound settings.
- Speak at a normal volume while watching the blue input meter.
- Raise microphone volume if the meter barely moves.
- Disconnect and reconnect USB or 3.5 mm audio devices.
- Check that headset mute switches and inline controls are not enabled.
Use the Windows Voice Recorder Test
Voice Recorder gives you a more realistic microphone test because it lets you listen to the result. Open the Start menu, search for Voice Recorder, and select the app. Press the blue record button, speak for 15 to 30 seconds, then stop the recording.
Play the recording through your speakers or headphones. Listen for low volume, crackling, background noise, clipping, or missing sound. This method confirms not only that Windows can hear the microphone, but also that the recorded audio is clear enough for calls, voice notes, and content creation.
Check the Recording Device Control Panel
The classic Sound control panel offers details that the Settings app does not always show. Right-click the speaker icon in the taskbar, select Sounds, and open the Recording tab. Your active microphone should display a green check mark and show a moving meter while you speak.
Right-click the microphone and select Properties to review Levels, Enhancements, Advanced, and Listen options. The Listen tab can send microphone audio to your speakers temporarily. Use it only for testing, as leaving it enabled can create an annoying delay or feedback loop.
Set a Microphone as the Default Device
Applications do not always follow the microphone you selected most recently. In the Recording tab, right-click your preferred device and choose Set as Default Device. If available, also choose Set as Default Communication Device for calling apps and conferencing software.
This setting is useful when a laptop automatically changes inputs after a webcam, docking station, or headset is connected. Setting a clear default reduces the chance that an app captures room noise from a distant built-in microphone instead of your close headset microphone.
Common Windows 10 Microphone Settings
| Setting | Where to Find It | Why It Matters |
|—|—|—|
| Input device | Settings > System > Sound | Chooses the microphone Windows receives sound from |
| Input volume | Device properties | Controls microphone loudness |
| Default device | Sound control panel > Recording | Guides apps that use system audio defaults |
| App permissions | Settings > Privacy > Microphone | Allows programs to access the microphone |
| Microphone boost | Recording device properties > Levels | Helps quiet microphones, but may add noise |
Allow Microphone Access in Privacy Settings
Windows 10 can block microphone access at the system level even when the device itself is working. Open Settings, choose Privacy, then select Microphone. Turn on Allow apps to access your microphone and make sure the master microphone access switch is enabled.
Scroll down the same page to check individual app permissions. If Zoom, Teams, Skype, Discord, Chrome, or another program is turned off, it cannot capture your voice. Desktop apps may appear in a separate section, so review both areas before assuming a hardware issue exists.
Test a Microphone in a Browser
Browser-based microphone tests can help you verify permissions and confirm that web apps receive audio. Open a reputable microphone test site in Chrome, Edge, or Firefox, allow microphone access when prompted, and speak normally. The site should show an input level or waveform.
If Windows detects sound but the website does not, inspect the browser permission near the address bar. Select the microphone option and choose the correct device. Refresh the page after changing permissions, because many websites only request audio access when they first load.
Test Voice Input in Communication Apps
Most communication apps include their own audio settings and test feature. In Zoom, open Settings and select Audio to test the microphone. In Microsoft Teams, use Settings and select Devices. Discord provides an Input Sensitivity meter and a dedicated microphone test option.
Choose the same microphone that works in Windows rather than leaving the app set to an unfamiliar device. Make a short test call or use the app’s recording feature. This reveals app-specific problems such as aggressive noise suppression, push-to-talk settings, or an accidental mute control.
Practical Tips for Better Test Results
- Test in a quiet room so you can hear unwanted hum, fan noise, and keyboard sounds.
- Keep the microphone about 4 to 8 inches from your mouth unless the manufacturer recommends otherwise.
- Speak in your normal meeting or recording voice rather than whispering or shouting.
- Use headphones during live tests to prevent speakers from feeding back into the microphone.
- Record a few sentences with soft and loud words to check for distortion.
- Disable unused microphones when Windows repeatedly selects the wrong device.
Troubleshoot a Microphone That Shows No Input
If no input meter moves, begin with the physical connection. Try another USB port, remove any USB hub, inspect the cable, and reconnect the device. For a 3.5 mm headset, make sure it is in the microphone or combined headset jack rather than the headphone-only port.
Next, restart Windows and test again. A restart often restores an audio service or reloads a device that was not recognized properly. If the microphone works on another computer but not yours, focus on Windows settings, drivers, ports, and permissions rather than the microphone itself.
Update or Reinstall the Audio Driver
A damaged, outdated, or incompatible driver can prevent Windows from receiving microphone audio. Right-click Start and open Device Manager. Expand Audio inputs and outputs, right-click the microphone, and choose Update driver. Let Windows search automatically for an available update.
If updating does not help, right-click the microphone and select Uninstall device, then restart the computer. Windows normally reinstalls the required driver. For laptops and professional audio hardware, visit the computer or manufacturer support page for the latest model-specific driver.
Run the Windows Audio Troubleshooter
Windows 10 includes a recording-audio troubleshooter that checks for common configuration errors. Open Settings, select Update & Security, choose Troubleshoot, then select Additional troubleshooters. Choose Recording Audio and run the tool while the microphone is connected.
The troubleshooter may identify a disabled device, incorrect default input, low microphone level, or permission conflict. It will not solve every driver or hardware problem, but it is a sensible early step because it checks several settings without requiring manual changes to each one.
Fix Bluetooth Headset Microphone Problems
Bluetooth headsets can show separate playback and microphone profiles. The headphones may play sound perfectly while their microphone remains unavailable or sounds poor. Open Sound settings and select the Bluetooth headset as the input device, then verify the input meter responds to speech.
Keep the headset charged and within a stable range of the computer. If problems continue, remove the device from Settings > Devices > Bluetooth & other devices, restart the computer, and pair it again. Updating the Bluetooth adapter driver may also resolve unreliable microphone connections.
Important Facts About Microphone Quality
- A moving input meter only confirms that sound is reaching Windows; it does not guarantee professional recording quality.
- Built-in laptop microphones usually capture more room noise than wired or USB headsets.
- Bluetooth microphone quality can drop when a headset switches from stereo playback to call mode.
- Noise suppression can improve calls but may cut off quiet speech or soften the start of words.
- A damaged cable can cause intermittent audio even when the microphone appears in Windows.
Improve Microphone Sound for Calls and Recordings
Position matters as much as software settings. Keep a headset boom close to the corner of your mouth rather than directly in front of it. This reduces breath sounds and plosive bursts from words beginning with P, B, and T while maintaining a consistent voice level.
Reduce noise at the source whenever possible. Close windows, move away from fans, silence phone notifications, and place the microphone away from keyboard vibrations. For more advice on clean voice recordings, see [microphone recording tips] and [how to reduce background noise].
Use Enhancements Carefully
Some audio drivers provide enhancements such as noise suppression, acoustic echo cancellation, and automatic gain control. These can help during video calls, especially when you use laptop speakers. However, they can also make a voice sound compressed, thin, or inconsistent during recordings.
Test with enhancements turned on and off using Voice Recorder. For meetings, noise suppression is often worth using. For podcasts, narration, music, and voice-over work, a clean recording with careful microphone placement usually gives you more control during later editing.
Check Exclusive Mode and Audio Formats
In the Advanced tab of microphone properties, Windows may allow applications to take exclusive control of the device. This can cause conflicts when one app holds the microphone and another application cannot access it. Clear the exclusive mode options if you experience repeated access problems.
The same tab may let you choose an audio format. Standard options such as 16-bit, 44.1 kHz or 48 kHz are reliable for most calls and recordings. Match the sample rate used by your recording software when possible, especially if you hear pops or inconsistent playback.
When to Replace or Upgrade Your Microphone
Consider replacement when the microphone has physical damage, persistent crackling across multiple computers, a loose connector, or weak output that cannot be improved with reasonable level settings. Test with another cable or port first, since these cheaper components are often responsible for the failure.
For routine meetings, a wired USB headset is usually a dependable upgrade over a laptop microphone. For streaming, podcasts, or regular narration, choose a USB microphone or audio interface suited to your room and recording habits rather than buying equipment solely for its marketing claims.
Conclusion
Testing your microphone does not need to be complicated. Start with Windows Sound settings, confirm that the input meter moves, and make a short Voice Recorder clip to assess actual audio quality. Then check the selected device, microphone level, privacy permissions, and the audio settings inside the app where the problem occurs.
If there is still no sound, work through physical connections, driver updates, Bluetooth pairing, and the Windows recording troubleshooter. These checks isolate most issues without requiring technical repairs. Once you know how to test microphone windows 10, you can prepare for calls and recordings with confidence, catch problems before they matter, and keep your voice clear for the people listening.
FAQ
How do I know if my microphone is working in Windows 10?
Open Settings, go to System and Sound, then speak while watching the input meter under Test your microphone. If the blue bar moves, Windows is receiving sound from the selected microphone.
Why is my microphone not picking up sound?
The microphone may be muted, disconnected, selected incorrectly, blocked by privacy settings, or set to a very low input level. Check each setting, reconnect the device, and test it with Voice Recorder.
How can I test my headset microphone?
Connect the headset, select it under Input in Windows Sound settings, and speak while checking the blue meter. Record a short Voice Recorder clip to confirm both the microphone level and sound quality.
Why does my microphone work in Windows but not in Zoom?
Zoom may be using a different input device or lack permission to use the microphone. Open Zoom Audio settings, choose the working device manually, and check Windows Privacy settings for microphone access.
Should I turn on microphone boost?
Use Microphone Boost only when your voice remains too quiet after raising the normal input volume. Increase it gradually and test recordings, because higher boost levels can introduce hiss, distortion, and background noise.
0 Comments